One of the benefits of SwiftUI is the ability to see a preview of the UI you are building in code. As you modifiy views, the preview to the side updates to reflect your changes.
When you first create an app, it comes with a simple preview as follows:
#Preview {
    ContentView()
}
#Preview is a macro used to preview the view specified, in this case, the ContentView. It is the newer version of PreviewProvider, although that can still be used. An example of that will be shown later in this tutorial.
As you generate views, you’ll quickly run into problems with being unable to preview because ContentView, or another view, might require something to be passed in. In this tutorial, I’ll go through some basics to help you get the most out of the preview macro.
The Preview macro and other view tools allow you to quickly test different varients across different devices, ensuring that your UI works on devices of all sizes and dark/light mode settings.
One thing you’ll do regulary is add parameters to your view as follows:
struct ContentView: View {
    var test: Int
The first error you might see is:
Missing argument for parameter 'test' in call
Because we’ve added a var called test into the view, when calling ContentView() in the preview, it expects a parameter to be passed. A simple fix is to modify the preview to include the parameter:
ContentView(test: 1)
There are other ways to pass in data that we will look at in a later tutorial, such as using sample data.
A single #Preview is helpful for quickly showing what your app will look like on a single device, and switching to another device is relatively easy with the menu at the bottom of the preview pane, but often, it is easier to define more than one preview as follows:
#Preview {
    ContentView(test: 1)
}

#Preview {
    ContentView(test: 2)
        .preferredColorScheme(.dark)
}

#Preview("Landscape Left", traits: .landscapeLeft) {
    ContentView(test: 3)
}

#Preview("Landscape Right", traits: .landscapeRight) {
    ContentView(test: 4)
}
SwiftUI lets you define many previews as seen above. Perhaps you want to test your app in landscape left or right or send in different values such as longer numbers, longer strings, or, in some cases, no data at all. Adding extra previews helps speed up development time.
You can also pass in a modifier called .preferredColorScheme and test your app in both light and dark mode to ensure that you have handled the UI correctly.
In the preview pane, you will now see four devices listed at the top and you can select between them.
There are times when you want to specify a particular device. To do this requires you use PreviewProvider. An example of an iPad Pro 13-inch is found below.
struct iPadPro13Inch_Previews: PreviewProvider {
    static var previews: some View {
        ContentView(test: 5)
            .previewDevice(PreviewDevice(rawValue: "iPad Pro 13-inch (M4)"))
    }
}
This code requires a raw value. To get a list of available options, with the command line tools installed you can run this from the terminal:
xcrun simctl list devicetypes
You can find the device you want and then copy/paste this as the raw value.
Yes, you can select a specific device at the bottom of the preview pane, but having them specified in the PreviewProvider makes this a little quicker for you.
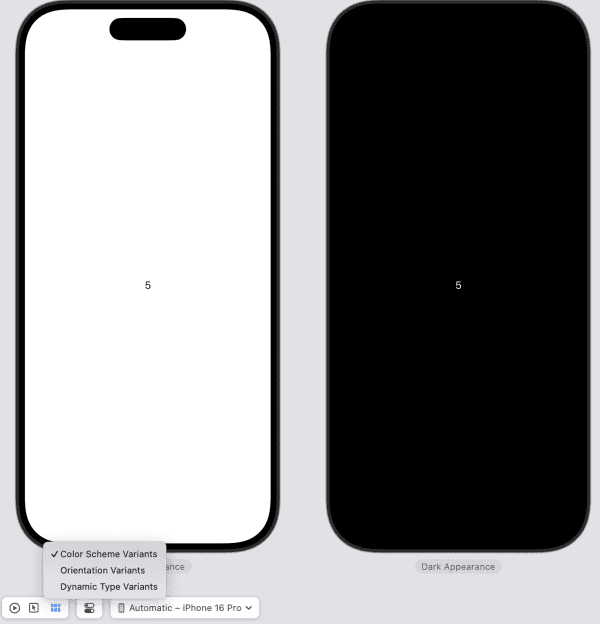
Previews have more helpful tools. These include the ability to show both dark and light mode side by side. You access this by selecting “Color Scheme Varients” as seen in the screenshot below.

Another option, as seen above, is Orientation Varients which puts portrait, landscape left, and landscape right all next to each other for quick viewing.
Finally, the Dynamic Type Varients shows you twelve devices on screen with different font sizes so that you can see what happens for users that have different font sizes selected in the system settings.
Although we only scratched the surface of what you can do with a preview, this will hopefully help speed up the time it takes to create views using SwiftUI. The ability to view different variations, as well as different font sizes is particularly helpful to ensure that users all get a good experience when using your app. Being able to have them all on screen at the same time is particularly helpful.
Leave a Reply
You must be logged in to post a comment.