WidgetKit launched with iOS 14 and provides a way for users to be able to see and interact with your app without launching your app. Widgets come in various sizes and when defined in your app, allows the user to put them on the home screen.
Widgets aim to provide users with quick access to essential information. They can also be interacted with, making them versatile tools for displaying and managing data.
In this tutorial we’ll look at a simple Pomodoro timer app, with adjustable intervals.
Begin by creating a new application in Xcode and when created, click on File > New > Target.

In the iOS section select a Widget Extension. Name it PomodoroWidget, uncheck “Include Configuration App Intent” leaving both “Include Live Activity” and “Include Control” active. Click Finish.
You will notice that in the left sidebar of the Pomodoro project there is now the Pomodoro app, and the Pomodoro Widget Extension.
To allow communication between the Widget Extension and the App, you next need to set up an App Group. To do this, select the project in the left sidebar (the first tab and top item which in our case is Pomodoro) and then select “Signing & Capabilities”. Make sure that you have selected the Pomodoro target before clicking Signing & Capabilities.
Click on the + Capability menu item (top left) and then add App Groups.

Next, click on the + and add a new container. Follow the format found above.
You now need to add the background capability by selecting it in + Capability. We will check the correct boxes later on in the tutorial.
Now that the app is ready, lets get the widget using the app group.
Select PomodoroWidgetExtension in the left sidebar, and then select Signing & Capabilities.
Click + Capability and then select App Groups.
You should see that the app group you added to the app target is available to use in the widget target. You need to just check the box to let it know this is what is needed.
Writing Code
Now that the project is ready, lets get writing some code for it.
Create a new Swift file in the Widget target and call it PomodoroEntry.swift
import WidgetKit

struct PomodoroEntry: TimelineEntry {
    let date: Date
    let timeRemaining: Int
    let isRunning: Bool
    let selectedDuration: Int
}
We create a struct that conforms to TimelineEntry. The TimelineEntry protocol requires us to have a date. The other three are custom for our requirements:
- timeRemaining is how long is left on our timer.
- isRunning is fairly self explanatory.
- selectedDuration tells us how long the timer we selected is.
Now create another Swift file, this time called PomodoroProvider.swift
import WidgetKit

struct PomodoroProvider: TimelineProvider {

}
Add the following to the new file. This particular struct conforms to the TimelineProvider protocol. That protocol requires three methods:
- placeholder
- getSnapshot
- getTimeline
The first one we will add is the placeholder.
struct PomodoroProvider: TimelineProvider {
    func placeholder(in context: Context) -> PomodoroEntry {
        PomodoroEntry(date: Date(), timeRemaining: 1500, isRunning: false, selectedDuration: 1500)
    }
...
The placeholder method is used when the widget loads, but doesn’t have the information it needs. Rather than showing a blank widget, we can populate it with some information to make it appear like something is there. In this case, we are throwing some numbers into PomodoroEntry so that the view has numbers to work with. When PomodoroEntry has real data, it will re-render the view as needed. Here though, we just populate the data.
Next, we will add the getSnapshot required method.
struct PomodoroProvider: TimelineProvider {
    ...
    func getSnapshot(in context: Context, completion: @escaping (PomodoroEntry) -> Void) {
        let sharedDefaults = UserDefaults(suiteName: "group.com.devfright.pomodorogroup")
        let isRunning = sharedDefaults?.bool(forKey: "isRunning") ?? false
        let timeRemaining = sharedDefaults?.integer(forKey: "timeRemaining") ?? 1500

        completion(PomodoroEntry(date: Date(), timeRemaining: timeRemaining, isRunning: isRunning, selectedDuration: 1500))
    }
...
The getSnapshot method is used to create the PomodoroEntry in a similar way to how the placeholder method does with a difference that it now checks UserDefaults for actual values. If they don’t exist, then it falls back to defaults such as isRunning being set to false and timeRemaining set to 1500.
The snapshot is used when previewing the widget as well as when populating the widget for first use. It’s another step to making Widgets look readily available and populated with data.
The final required method is getTimeline:
struct PomodoroProvider: TimelineProvider {
    ...
    func getTimeline(in context: Context, completion: @escaping (Timeline<PomodoroEntry>) -> Void) {
        let sharedDefaults = UserDefaults(suiteName: "group.com.devfright.pomodorogroup")
        let isRunning = sharedDefaults?.bool(forKey: "isRunning") ?? false
        let timeRemaining = sharedDefaults?.integer(forKey: "timeRemaining") ?? 1500

        let entry = PomodoroEntry(date: Date(), timeRemaining: timeRemaining, isRunning: isRunning, selectedDuration: 1500)

        let refreshPolicy: TimelineReloadPolicy = isRunning ? .after(Date().addingTimeInterval(60)) : .after(Date().addingTimeInterval(3600))

        completion(Timeline(entries: [entry], policy: refreshPolicy))
    }
}
The getTimeline method is used after getSnapshot and is responsible for getting actual data for the widget. Although snapshot does get data, the app might not have done some updates, so it only gets the latest that it knows of.
This method defines how often the widget should refresh its data. That could be every minute, every hour, and so on.
The first few lines are identical to getSnapshot in that it reaches out to UserDefaults and grabs what it can and uses defaults if information isn’t available. This code would be refactored to be kept DRY, but is sufficient for our needs today. Note that other data storage can be accessed here, such as Core Data, if that is where you store information. For the purposes of this tutorial, UserDefaults will work great.
The interesting line is the refresh policy which instructs on how often the widget should update. This is line 10. Notice that it uses a ternary operator which checks if the timer is running. If it is, it will refresh the widget every 60 seconds. If it is not running, it will update the widget every 3,600 seconds (1 hour).
We then call the completion handler passing back the timeline entries and policy.
Creating the Widget View
If you run the app now, you will notice something in the widget that is not what we want. Lets take a look at whats going on and make some changes.
Create a new Swift file in the Widget target. Call it PomodoroWidgetView.swift
import SwiftUI
import WidgetKit

struct PomodoroWidgetView: View {
    var entry: PomodoroEntry

    var body: some View {
        ZStack {
            Color(.systemBackground)

            VStack {
                if entry.isRunning {
                    Text("⏳ \(entry.timeRemaining / 60):\(String(format: "%02d", entry.timeRemaining % 60)) left")
                        .font(.headline)
                        .multilineTextAlignment(.center)
                } else {
                    VStack {
                        Text("🍅")
                            .font(.title2)
                        Text("Pomodoro")
                            .font(.title2)
                        Text("\(entry.selectedDuration / 60) min")
                            .font(.caption)
                            .foregroundColor(.gray)
                    }
                }
            }
            .padding()
        }
        .containerBackground(.fill.tertiary, for: .widget)
    }
}
To get moving, we’ll use this basic view that shows the content in a widget. The view has two states. If the timer is running then it shows time left. If the timer is not running, it will give you the option to start a 25 minute timer.
The view is fairly self explanatory in that it takes a PomodoroEntry and uses the values in there to adjust what is on screen. We will clean this up in part two of the tutorial.
Next, open PomodoroWidget.swift and replace the code with:
import WidgetKit
import SwiftUI

struct PomodoroWidget: Widget {
    let kind: String = "PomodoroWidget"

    var body: some WidgetConfiguration {
        StaticConfiguration(kind: kind, provider: PomodoroProvider()) { entry in
            PomodoroWidgetView(entry: entry)
        }
        .configurationDisplayName("My Widget")
        .description("This is an example widget.")
    }
}

#Preview(as: .systemSmall) {
    PomodoroWidget()
} timeline: {
    PomodoroEntry(date: .now, timeRemaining: 1500, isRunning: false, selectedDuration: 1500)
    PomodoroEntry(date: .now, timeRemaining: 1200, isRunning: true, selectedDuration: 1500)
}
I’ll explain this code.
Line 4 declares a struct that conforms to Widget.
Line 5 is a string that identifies the widget. In our case, we’ll call this widget “PomodoroWidget”.
We then declare a body that returns “some” WidgetConfiguration.
Lines 8, 9, 10, we create a StaticConfiguration. Other options include App Intent or Activities.
We pass in the kind which was declared earlier and the PomodoroProvider which contains the placeholder, snapshot, and timeline.
Line 9 we get the view (PomodoroWidgetView) and pass in the entry as a parameter. The entry is the data from the provider which could either be from the placeholder, snapshot, or timeline.
Closing
This tutorial will be finished in part 2 where we will start making it useful.
In this tutorial we learned how to create a Widget Extension target and configure it to use an App Group.
We looked at some of the structs and protocols needed such as the TimelineEntry, TimelineProvider, and what each of the required methods do.
We then created a custom view for the widget and adapted the PomodoroWidget to use our view and get the data from the provider.
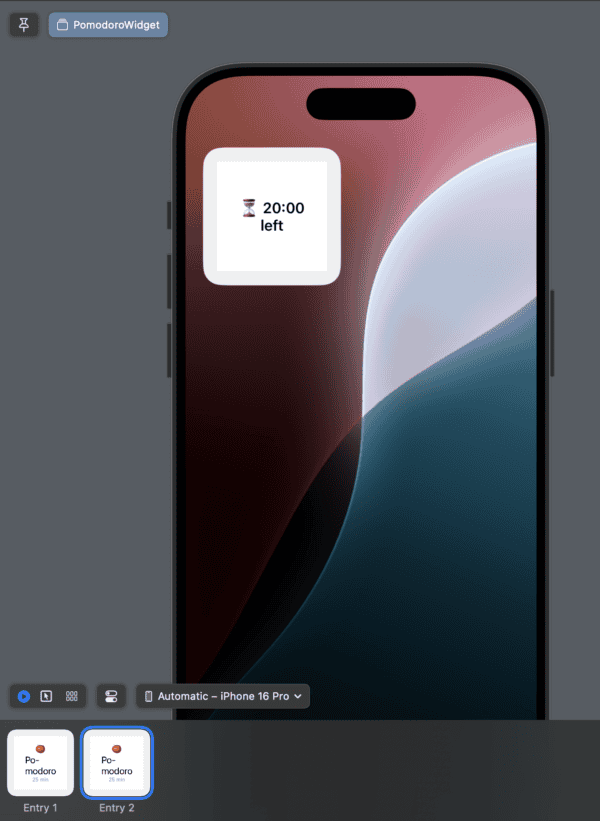
When you preview the app now, you will see what the view looks like in each widget type (remembering that we show a different view if the timer is running or not.
In the next tutorial we’ll look at being able to start the timer and have the widget update, and then we’ll move onto creating it as a Live Activity that runs in the Dynamic Island on the device.
Any questions, please post below and I will promptly answer.
Leave a Reply
You must be logged in to post a comment.