SwiftUI views work with view modifiers that make it really simple to create great effects. In this tutorial, we’ll look at making a rounded profile picture that you might use on a profile page in your app.
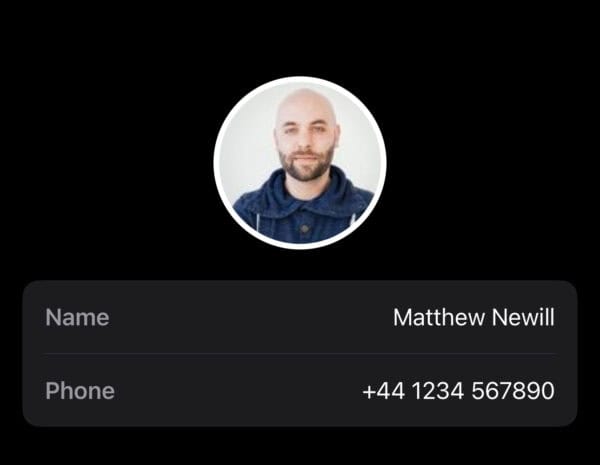
This particular profile picture (not me), is created with an Image view with several view modifiers to clip the corners to make a circle as well as add a small border around it. The result looks surprisingly good.
This particular app will work with three views. The content view that contains the profile view, and the profile view which contains the profile image view.
struct ProfileView: View {
    var body: some View {
        VStack(spacing: 24) {
            RemoteProfileImageView()
                .padding(.top, 40)

            VStack(alignment: .leading, spacing: 16) {
                HStack {
                    Text("Name")
                        .font(.headline)
                        .foregroundColor(.secondary)
                    Spacer()
                    Text("Matthew Newill")
                        .font(.body)
                }

                Divider()

                HStack {
                    Text("Phone")
                        .font(.headline)
                        .foregroundColor(.secondary)
                    Spacer()
                    Text("+44 1234 567890")
                        .font(.body)
                }
            }
            .padding()
            .frame(maxWidth: .infinity)
            .background(Color(.systemGray6))
            .cornerRadius(12)
            .padding(.horizontal)

            Spacer()
        }
    }
}
The code above is creates a view called ProfileView that contains a body which contains a VStack. The first item in this VStack is a RemoteProfileImageView that hasn’t been created just yet, but this will bring in the image that is clipped to be a profile image.
The rest of the code just adds a little extra to give a very basic profile looking page that contains a name and phone number.
Moving onto the RemoteProfileImageView, we can implement this as follows:
struct RemoteProfileImageView: View {
    let imageUrl = URL(string: "https://thispersondoesnotexist.com")!

    var body: some View {
        AsyncImage(url: imageUrl) { image in
            image
                .resizable()
                .scaledToFill()
                .frame(width: 120, height: 120)
                .clipShape(Circle())
                .overlay(
                    Circle()
                        .stroke(Color.white, lineWidth: 4)
                )
                .shadow(radius: 10)
        } placeholder: {
            ProgressView()
                .frame(width: 120, height: 120)
        }
    }
}
This view is where we grab our profile image and make the necessary changes for it to work.
The first thing we do is create a URL where we will get our image from. I opted for thispersondoesnotexist.com because each request to that page gives a new profile picture which is ideal for testing an app with.
In the body we call AsyncImage and pass in the URL which begins to fetch the image. When the image has downloaded it puts that image in the view, clips it to be a circle, then adds an overlay circle in white that has a 4px width.
We also have a placeholder that shows a progress view.
To bring this together, we just call the ProfileView from our ContentView.
struct ContentView: View {
    var body: some View {
        ProfileView()
    }
}
This is all there is to creating a great looking profile image.
Leave a Reply
You must be logged in to post a comment.