Updated for Xcode 13.
In this tutorial I will walk you through setting up your first Xcode project so that you can begin working on your first app. If you haven’t installed Xcode yet you can either grab it from the Mac App Store, or if you have an Apple iOS developers account you can download the latest beta version from within there.
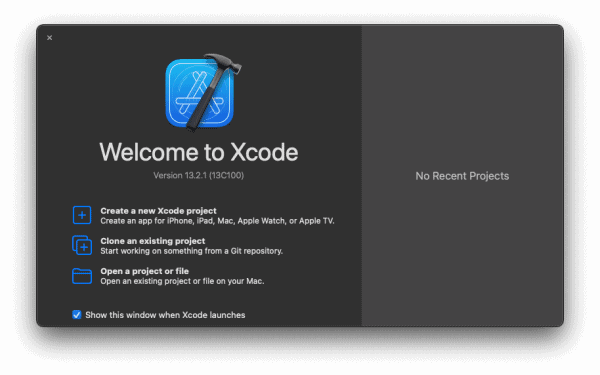
Now that you have Xcode installed, it’s time to load it up. Upon loading Xcode you get the following screen:

Down the right side you will have a list of projects that you have recently opened. To set up a new project, click on “Create a New Xcode Project”.

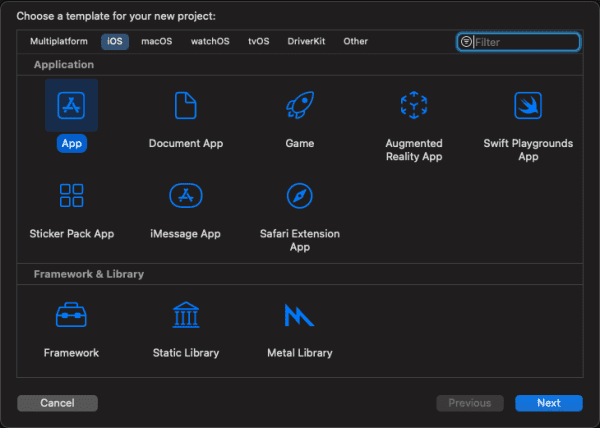
Ensure that iOS is selected in the top menu. You can then select App, and then click Next. Please note that these are just templates. If you wanted to create an Augmented Reality App you could start with a the App option and then add in the necessary framework and code to still create an Augmented Reality App. The templates just act as convenient starter projects to get you going. For many of the tutorials on DevFright we will start from the standard App.
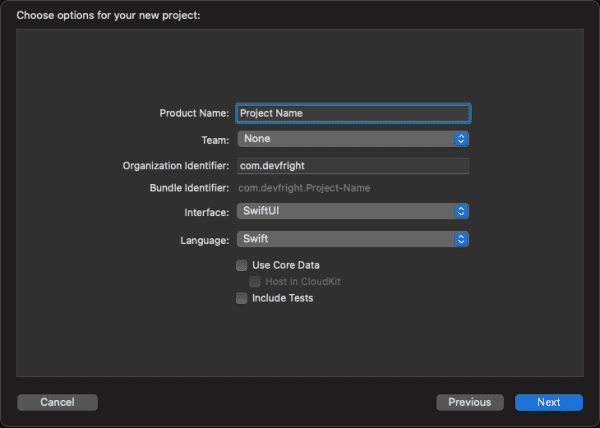
After clicking next, you are presented with more options:

Starting from the top we have:
Product Name which is what your app will be called. Choose something relatively short here as iTunes restricts the length of the name that is visible in the app store… so if you can fit it in to fewer characters (perhaps 10 or 11) then they will all be visible in the App Store on the main screen. You can change the product name at any point, but the folder name where the project is stored on your Mac will retain this name.
Team is populated by the name on your developer account. Depending on what type of developer account you have will depend on what is available here. None is OK if you are just testing, but you might select your business name or personal name from this dropdown.
Organization Identifier is often recommended to be written in reverse notation. So in this case com.devfright was used because this website is devfright.com. There is no real link between organization identifier and your actual domain name though. I just recommend using your domain name as it’s unique to you. The key here is that if you upload an app to be included in the app store, the bundle identifier needs to be unique. Note that in the next line it says Bundle Identifier which is pre-populated with your organization identifier and product name.
Interface is set to SwiftUI because it’s the latest technology to use to create apps.
Language now only offers Swift as an option.
The last options will typically be switched off for our tutorials, unless the tutorial is about Core Data or unit tests. If you switch them on, it isn’t a problem though.
Click Next and you will be presented with the finder where you can choose where you want to save the project. You will also have a check box which enables or disables Git repositories. Feel free to leave this enabled or disabled. I would recommend you enable it on real projects though.
Now that you have saved your new app, you are now ready to begin working on it.
Leave a Reply
You must be logged in to post a comment.