UIAlert and UIActionSheet have been replaced by UIActionViewController which now handles both.
To demonstrate both in one example I’ll make a short little tutorial showing how to fire an AlertView and also how to bring up an ActionSheet with options.
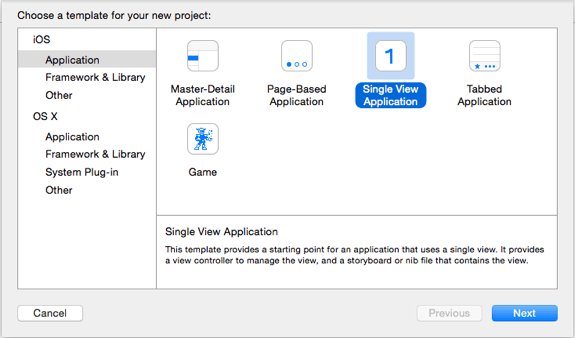
Start with a new project, single view application, Click NEXT. Select (language)Swift, (device)iPhone, and Save wherever you wish.
To make the examples more interesting, this is going to be a number guessing game between zero and three! Entries of “4”, “5”, or “6” will show different alert styles.
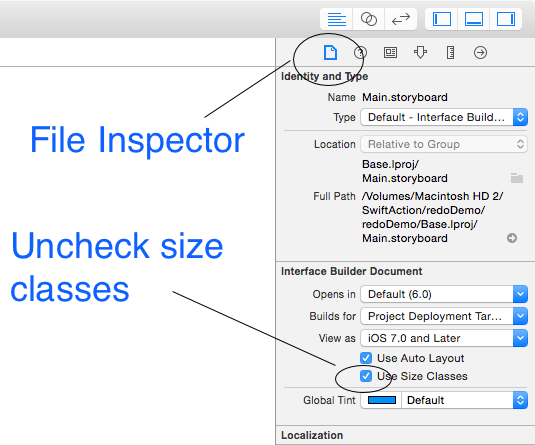
Click on the Storyboard. Because we are making a project for the iPhone, click on the file inspector and uncheck Use Size Classes. The storyboard will now be in the size of the iPhone.
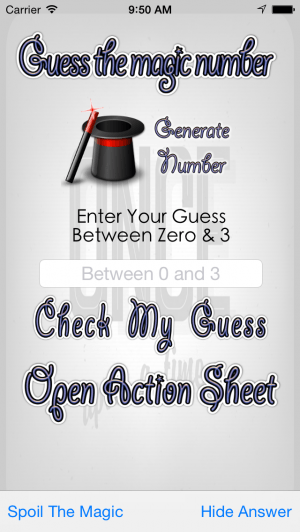
Now that the storyboard looks “normal” lets drag on the elements we’ll be using.
– Label: which will say “Guess the magic number” This is just a static label with no connections.
– Button: to generate the magic number between 0 and 3. This will be an ACTION.
– Label: that will display the generated number. This will be an OUTLET.
– Label: which will say “Enter your guess” This is a static label with no connections.
– Textfield: for number entry. This will be an OUTLET
– Button: To check the guess. This will be an ACTION
– Button: to call the ActionSheet. This will be an ACTION
– Toolbar: which will contain two buttons. One to show the random number and one to hide the random number. Both will be ACTIONS.
Arrange these however you like. I listed these from top to bottom as this is how I set it up in the demo project which you can download at the end of this tutorial.
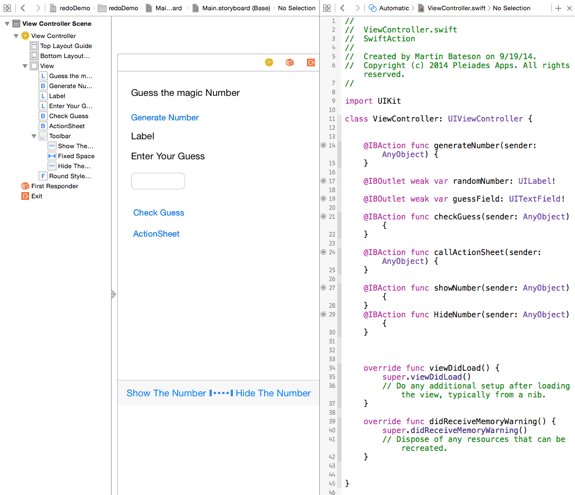
With the storyboard in the workspace, on the left side of your pane, Option+Click on the ViewController.swift file and the Assistant Editor will open so that we can make our connections.
import UIKit

class ViewController: UIViewController {

    @IBAction func generateNumber(sender: AnyObject) {
    }

    @IBOutlet weak var randomNumber: UILabel!

    @IBOutlet weak var guessField: UITextField!

    @IBAction func checkGuess(sender: AnyObject) {
    }

    @IBAction func callActionSheet(sender: AnyObject) {
    }

    @IBAction func showNumber(sender: AnyObject) {
    }
    @IBAction func HideNumber(sender: AnyObject) {
    }

    override func viewDidLoad() {
        super.viewDidLoad()
        // Do any additional setup after loading the view, typically from a nib.
    }
Your project should look similar to the screen shot below.
The first action we’ll code is the generateNumber button. The code will generate a random number and put the number into the randomNumber label. Between the curly braces of the action method add the following code.
@IBAction func generateNumber(sender: AnyObject) {
        let magicNumber = Int(arc4random_uniform(4))
        println(magicNumber)
        randomNumber.text = String(format: "%i", magicNumber)
    }
let magicNumber is the name of our constant – and we are getting a random number from arc4random (an Int) from 0 to 3.
println is the same as NSLog(@”magicNumber”)
The text for our randomNumber label will be a string converted from an Int, magicNumber.
Moving on to the text field….
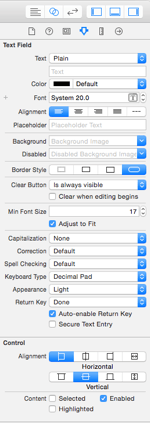
In the storyboard, select the text field that we dragged onto the view and open the utilities inspector pane. Check these options, Clear Button: is always visible. Keyboard Type: Decimal Pad. The is “always visible” option provides an easy way for the user to clear the text field.
 We’ll implement two methods to dismiss the keyboard after our text is entered. But first we have to make the text field a delegate of the view. Right click on the text field in the storyboard. A pop-up window appears with possible connections. From the radio button on the right side under Outlets, drag to the view controller and let go.
To dismiss the keyboard by touching anywhere on the screen we’ll use the touches began method. With a touch on the screen it tells the view we are done editing the text field and the keyboard can disappear.
override func touchesBegan(touches: NSSet, withEvent event: UIEvent) {
        [self.view .endEditing(true)];
    }
The next button to code is the checkGuess button.
The first thing to do is dismiss the keyboard when the button is touch (redundant, I know but it’s an additional way to do it).
Next we’ll add an if statement which will compare our random number to the text field entry.
Then we’ll handle the response with two different alert views. One alert if correct, one alert if not correct.
Between the curly braces of the checkGuess button method add the following:
[self.view .endEditing(true)] // dismiss the keyboard

if guessField.text == randomNumber.text {

let alert = UIAlertController(title: "Yes you're an amazing guesser", message: "Woo Hoo!!!", preferredStyle: UIAlertControllerStyle.Alert)

let alertActionTrue = UIAlertAction(title: "OK",
style: UIAlertActionStyle.Default,
handler: {(alert: UIAlertAction!) in (self.guessField.text = "")})

alert.addAction(alertActionTrue)

self .presentViewController(alert, animated: true, completion: nil)
The “if” statement compares the random number to the text field entry. If correct, we create a constant and name it “alert” (you can name it anything). “alert” equals UIAlertController with the following parameters: title,message,and style. There are two choices on the style. ActionSheet or Alert.
We then create another constant (name of your choice) let alertActionTrue… and define the parameters of the UIAlertAction… title,style, and handler.
There are three styles to chose from. They are Default,Cancel, and Destructive. The handler can be nil but in this case I want to clear the text field when this runs.
We then call the AlertController, add the Action, and present it. Pretty straight forward. Now add the else statement in the same manner… the full button code looks like this.
@IBAction func checkGuess(sender: AnyObject) {
[self.view .endEditing(true)] // dismiss the keyboard

if guessField.text == randomNumber.text {

let alert = UIAlertController(title: "Yes you're an amazing guesser", message: "Woo Hoo!!!", preferredStyle: UIAlertControllerStyle.Alert)

let alertActionTrue = UIAlertAction(title: "OK",
style: UIAlertActionStyle.Default,
handler: {(alert: UIAlertAction!) in (self.guessField.text = "")})

alert.addAction(alertActionTrue)

self .presentViewController(alert, animated: true, completion: nil)
} else if guessField.text < String(format: "%i", 4){

let alert = UIAlertController(title: "Sorry, That's NOT the Magic Number", message: "Guess Again", preferredStyle: UIAlertControllerStyle.Alert)

let alertActionFalse = UIAlertAction(title: "Try Again", style: UIAlertActionStyle.Destructive, handler: {(alert: UIAlertAction!) in (self.guessField.text = "")})

alert.addAction(alertActionFalse)

self .presentViewController(alert, animated: true, completion: nil)

}

}
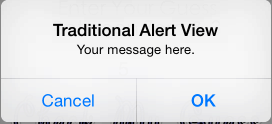
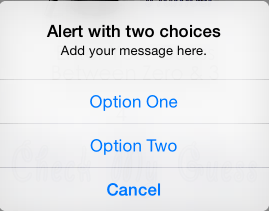
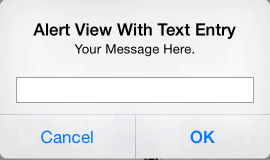
Our Alerts will appear in the styles below.
To demonstrate three more common styles we will allow the text field entries of 4,5 or 6 to display the other styles. Download the demo project to see how these are executed.
Before moving on to the ActionSheet lets take care of the toolbar buttons. One will hide the label with the random number and one will show the label with the random number. Additionally (and this is the only code we're adding to viewDidLoad) we'll hide the label when the app loads.
Add this code to our buttons
@IBAction func showNumber(sender: AnyObject) {
randomNumber.hidden=false;

}
@IBAction func HideNumber(sender: AnyObject) {
randomNumber.hidden=true;

}
Also add randomNumber.hidden=true; to the viewDidLoadMethod.
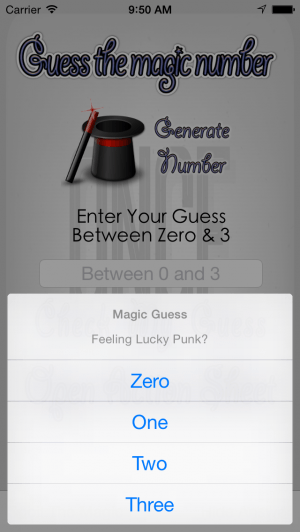
The ActionSheet is very useful for giving the user predefined choices and provides an easy way to then handle those choices.
In the button @IBAction func callActionSheet(sender: AnyObject)... add the following code.
let actionSheet = UIAlertController(title: "Magic Guess", message: "Feeling Lucky Punk?", preferredStyle: UIAlertControllerStyle.ActionSheet)

let option1 = UIAlertAction(title: "One", style: UIAlertActionStyle.Default, handler: {(actionSheet: UIAlertAction!) in (self.guessField.text = "1")})
You'll notice this is nearly identical and implemented in the same way. We create a constant and give it a name. The named constant equals the UIAlertController but this time with the style of ActionSheet.
We then create and action and define the parameters. The parameters are title, style, and handler. ActionSheet also has three styles - Default, Cancel, and Destructive.
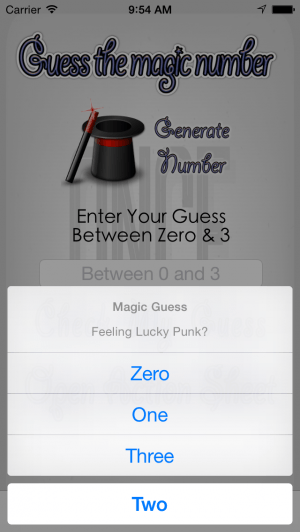
Destructive will make the action field appear with red text. Cancel will put that action at the bottom of the selection list. You'll see this later on...
In the handler I have a number (1) being entered into the text field when a row ("One") on the action sheet is touched.
We then add the action to the controller and present it...
actionSheet.addAction(option1)

self.presentViewController(actionSheet, animated: true, completion: nil)
I put in multiple entries just to illustrate the possibilities of ActionSheet.
@IBAction func callActionSheet(sender: AnyObject) {
let actionSheet = UIAlertController(title: "Magic Guess", message: "Feeling Lucky Punk?", preferredStyle: UIAlertControllerStyle.ActionSheet)
let option0 = UIAlertAction(title: "Zero", style: UIAlertActionStyle.Default, handler: {(actionSheet: UIAlertAction!) in (self.guessField.text = "0")})
let option1 = UIAlertAction(title: "One", style: UIAlertActionStyle.Default, handler: {(actionSheet: UIAlertAction!) in (self.guessField.text = "1")})
let option2 = UIAlertAction(title: "Two", style: UIAlertActionStyle.Default, handler: {(actionSheet: UIAlertAction!) in (self.guessField.text = "2")})
let option3 = UIAlertAction(title: "Three", style: UIAlertActionStyle.Default, handler: {(actionSheet: UIAlertAction!) in (self.guessField.text = "3")})


actionSheet.addAction(option0)
actionSheet.addAction(option1)
actionSheet.addAction(option2)
actionSheet.addAction(option3)


self.presentViewController(actionSheet, animated: true, completion: nil)
}
Build and Run.
Now change option 2 to the style of "cancel". Build and Run again. You'll see that the "Two" selection moves to the bottom even though it's in the middle of our code.
While there should be some error handling functions added (for example if the random number label is empty), this is a quick project demonstrating Alerts and ActionSheet
You can download the project here. SwiftAction.xcodeproj 2

Esteban says
Good morning. The SwiftAction.xcodeproj-2 is not working, can you re-upload it please? Thank you :)
Satish Reddy Garlapati says
how about capturing the alertController as weak when I want to dismiss the alertController in one of the alertActions? (to escape the retain cycle)