When Xcode 12 was launched in 2020 it brought with it a new app life cycle for SwiftUI applications. Prior to this, SwiftUI based apps were using AppDelegate.swift and SceneDelegate.swift.
Creating a new app can be done with this code:
import SwiftUI

@main
struct MyNewApp: App {
    var body: some Scene {
        WindowGroup {
            ContentView()
        }
    }
}
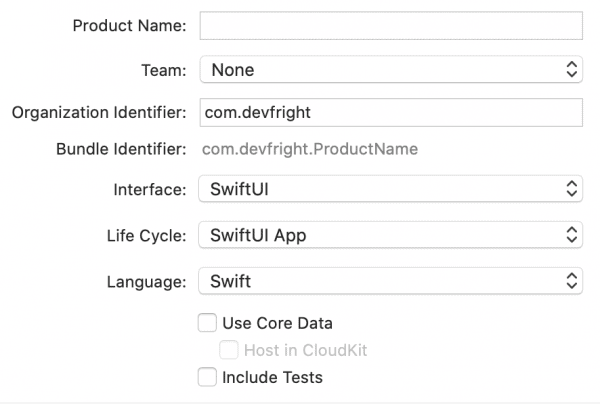
To create an app that uses the new App protocol, you can go to begin a new project in Xcode and when selecting the options for the project, you can choose either SwiftUI App or UIKit App Delegate under the Life Cycle option. Selecting the latter allows you to work with the more familiar AppDelegate and SceneDelegate that you may have been using. The option is found in the screenshot below.

Looking Closer at the App Protocol
The code pasted above shows the minimum needed to create an app.
@main
This attribute was implemented in Swift 5.3 and specifies the entry point into the program. @main can only be used once in the code. If adding to a second location you get a duplicate symbol error. Likewise, if you don’t add an @main anywhere in code you get an entry point undefined error. Adding @main requires more than just adding the attribute to code. The program needs a main function adding, although this is handled for you behind the scenes in the provided code.
App Protocol
The next line of code declares a struct as follows:
struct MyNewApp: App {
    ...
}
The struct is called “MyNewApp” and it conforms to the App protocol. This protocol has a few requirements, all of which are fulfilled by default in the default Xcode template.
Scene
One of the requirements is that you must return a scene. The default app template used to set up a new project includes WindowGroup which is a scene where you can put your SwiftUI views. In the example below the SwiftUI view being used is in ContentView.swift. You can create your own scenes if desired. WindowGroup returns the required scene in this instance.
var body: some Scene {
    WindowGroup {
        ContentView()
    }
}
As well as WindowGroup being available, Apple provides DocumentGroup which is a scene that allows you to work with documents. Settings is another scene type that allows for modifying the settings of the app. “Settings” is for macOS only though, so when using it you’ll need to wrap a #if around it as detailed here.
The final scene available is the WKNotificationScene for watchOS apps.
Where Next?
With these items in place, you can now go to ContentView, or WhatEverViewYouWantView and begin building your SwiftUI interface. Of course, there’s a lot to learn such as how to handle notifications or how to use CoreData or similar service, but these will be covered soon at DevFright. If you want to check out an example of how Apple uses the App protocol then check out this post about three-column layouts from last week.
Leave a Reply
You must be logged in to post a comment.